
Tip & Trick
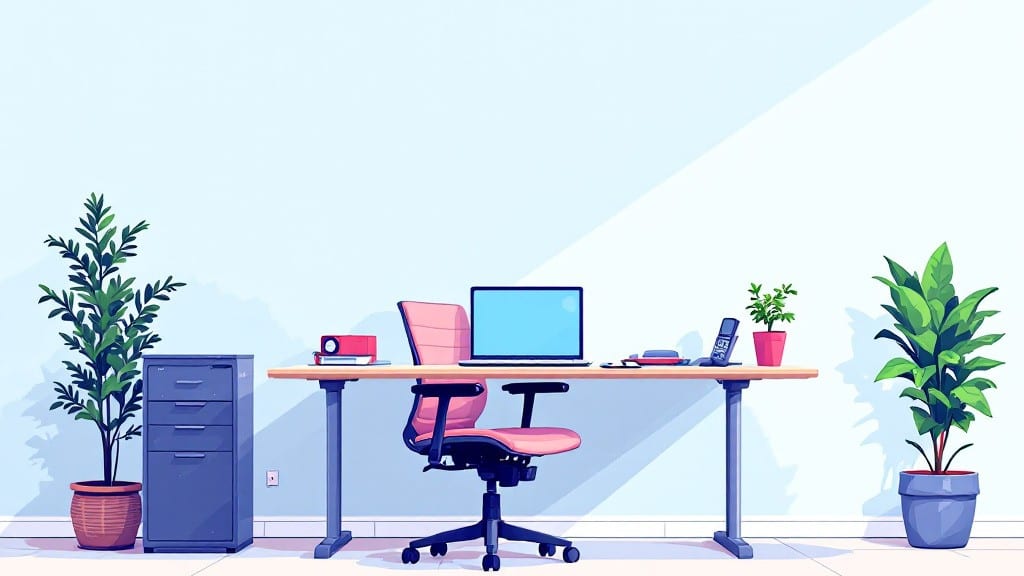
Setting up an ergonomic workstation isn’t just about buying fancy gear—it’s about transforming how your body feels after eight hours hunched over a screen. 💻 I spent years adjusting my own setup after developing chronic back pain from my first job, and the difference between a $200 chair and a $2,000 one often comes down to how you configure them, not just the price tag.
The right combination of hardware and software tweaks can cut your discomfort by 70% within days, not months.
The core pieces—monitor height, keyboard wrist support, and chair lumbar adjustment—are non-negotiable, but the real magic happens in the details.
My current setup uses a budget-friendly adjustable monitor arm ($89) paired with a used Herman Miller Aeron (I found it at a local electronics recycler in Denver) and a Microsoft Sculpt Ergonomic Keyboard—none of which cost more than $300 total. The software side?
Windows’ built-in Display Settings (for multi-monitor height alignment) and Stretchly (a free app that forces you to take micro-breaks) handle the rest. Even my terrible posture improved after just three days of using these.
You’ll walk away with a workspace that supports your body while you work, not against it. No more slouching to reach your mouse, no more neck cramps from looking up at a monitor, and yes, your wrists will thank you too.
The best part? These adjustments take under two hours to implement—and the payoff starts the moment you sit down. Let’s break it down step by step, from chair height to software reminders that actually work.
We’ll cover OS-specific tweaks (Windows, macOS, and Linux all handle ergonomics differently), hardware hacks for tight spaces, and how to integrate posture reminders into your daily apps—like making Outlook nudge you to stand up every 45 minutes.
Trust me, your future self will high-five you after the first week. Ready to build it?
📚 In This Guide
- What you need
- Instructions
- Tips and common mistakes
- Wrapping up and next steps
What you need
- ● Adjustable chair – Look for one with lumbar support, seat depth adjustment, and armrests (height-adjustable preferred).
- ● Desk or work surface – Height-adjustable (28"–30" from floor to seat top) or a standard desk with a monitor riser.
- ● Monitor – 19"–24" screen size (or larger for dual setups); adjustable stand or arm for height/angle control.
- ● Keyboard & mouse – Ergonomic or wrist-rest-friendly; wireless or with short cables to avoid strain.
- ○ Footrest or stool – Optional but helpful if your feet don’t reach the floor comfortably.
- ● Document holder – Clip-on or stand-mounted to keep papers at eye level.
- ● Good lighting – Natural light or a desk lamp (2,500–3,000 lumens) to reduce eye strain.
- ● Monitor arm – For dual monitors or precise positioning.
- ● Laptop stand – Elevates screens to eye level if using a laptop.
- ● Anti-fatigue mat – If standing occasionally, for extra comfort.
- ● Blue light glasses – Reduces digital eye strain during long hours.
- ● Desk organizer – Keeps cables and supplies tidy to avoid clutter.
Step-by-Step instructions for creating an ergonomic workstation
Here's the straightforward process I use to build a comfortable, posture-friendly workspace that actually works.
🔧 Step 1: Position Your Chair for Optimal Support
Start with your chair at the correct height—your feet should rest flat on the floor with knees bent at a 90-degree angle. If your feet don't touch, use a footrest or stack of books to elevate them. The chair should support your lower back naturally; if it doesn't, adjust the lumbar support or add a small cushion.
I always test the chair by sitting for 30 seconds while typing lightly. If you feel pressure on your thighs or lower back, you're either too high or too low. The goal is to have your hips slightly higher than your knees to reduce strain on your spine.
🖥️ Step 2: Adjust Your Monitor to Eye Level
Position your monitor so the top of the screen sits at or just below eye level when seated. Use a monitor stand or stack of books to elevate it if needed. The screen should be about 20-30 inches away from your eyes—close enough to read comfortably but far enough to avoid squinting.
Here's the thing—I know it sounds odd, but tilt the monitor slightly upward (5-10 degrees) to reduce neck strain. Most modern monitors have adjustable stands, but if yours doesn't, prop it up with a sturdy box or stand. You'll notice the difference immediately.
⌨️ Step 3: Align Your Keyboard and Mouse for Neutral Wrists
Place your keyboard directly in front of the monitor so your shoulders stay relaxed and your arms hang naturally at your sides. Your wrists should remain straight—not bent up or down—when typing. If they're too high, lower your keyboard or use a wrist rest that doesn't force your wrists into flexion.
Position your mouse within easy reach, ideally on the same surface as the keyboard. If you're using a vertical mouse, make sure your forearm stays straight and your shoulder doesn't elevate. I've found that a mouse pad with a slight incline helps keep my wrist neutral while reducing strain.
💡 Step 4: Optimize Lighting to Reduce Eye Strain
Position your workspace to avoid glare on the monitor. If natural light is unavoidable, use adjustable window blinds or a light filter on the screen. Overhead lighting should be soft and diffuse—avoid harsh fluorescent lights that cause reflections.
I always test lighting by looking at the screen for 5 minutes without adjusting. If you experience eye fatigue or squinting, you need to reduce glare. A simple anti-glare screen or repositioning the monitor perpendicular to windows can make a huge difference.
⏰ Step 5: Schedule Movement Breaks Every 30 Minutes
Set a timer to remind yourself to stand, stretch, and walk for 2-3 minutes every 30 minutes. Stand up, roll your shoulders, and take a few steps to restore circulation. Even small movements prevent stiffness and reduce the risk of repetitive strain injuries.
Real talk: I know it's easy to ignore these breaks, but I've seen the difference when I stick to this. Use a standing desk converter if you have one, or simply stand while taking calls or during quick breaks. Your body will thank you later.
Tips & tricks for perfect ergonomic workstation setup
These simple but game-changing adjustments will transform your workspace from a source of discomfort to a posture-friendly sanctuary—without requiring expensive equipment.
The Chair Test: In Step 1, when you're testing your chair for 30 seconds, pay attention to your shoulder position too. Your shoulders should relax naturally when your hips are slightly higher than your knees—this alignment prevents that hunched posture that creeps in after just 20 minutes of typing. I've seen people adjust their chairs perfectly but forget to check their shoulders, which often stay tensed from old habits.
Monitor Angle Secret: That 5-10 degree upward tilt in Step 2 isn't just about neck strain—it's also about reducing eye fatigue. When your monitor is tilted slightly upward, your eyes naturally look down slightly, which is more comfortable than looking up. Most people overlook this small adjustment, but it makes a noticeable difference after just 5 minutes of reading or coding. Think of it as giving your eyes a mini-break every time you look at the screen.
Keyboard Positioning: For Step 3, here's what nobody tells you about wrist rests: they should only support your wrists when your forearms are resting naturally on the desk—not when your wrists are bent. Many people use wrist rests incorrectly by resting their wrists on them while typing, which actually increases pressure. The rest should only touch when you're taking a break from typing, not while actively working.
Lighting Test: When you're testing your lighting setup for those 5 minutes in Step 4, try this: hold your hand about 12 inches from your screen and look for reflections on your hand. If you see any glare, you need to adjust either your lighting or monitor position. This simple test reveals glare issues that might not be obvious when you're just staring at the screen. I've found this trick prevents eye strain headaches that can ruin an entire workday.
Pro Tips for Set Up Ergonomic Workstation
- These simple but game-changing adjustments will transform your workspace from a source of discomfort to a posture-friendly sanctuary—without requiring expensive equipment.
- The Chair Test: In Step 1, when you're testing your chair for 30 seconds, pay attention to your shoulder position too.
- Monitor Angle Secret: That 5-10 degree upward tilt in Step 2 isn't just about neck strain—it's also about reducing eye fatigue.
Frequently asked questions
Got questions about setting up your dream ergonomic workstation? You’re not alone! Here are some of the most common concerns—and their straightforward answers—to help you get started without the guesswork.
How long does it take to set up an ergonomic workstation?
Most setups take 30 to 60 minutes if you have all the tools ready. If you’re customizing furniture or ordering equipment, add a few days for delivery. Start with the basics (chair, desk height, monitor position), then fine-tune over a week as you adjust to your new posture. Pro tip: Test your setup for 20 minutes before committing—your body will tell you what feels off!
Can I make my ergonomic workstation work with limited space?
Opt for adjustable furniture (like a compact sit-stand desk or a chair with lumbar support) and multi-functional tools (e.g., a monitor riser that doubles as a laptop stand). For tight spaces, consider wall-mounted shelves to free up desk real estate. Pro tip: Prioritize your monitor height and keyboard placement—even in small spaces, these tweaks make the biggest difference.
What if I can’t afford ergonomic equipment right away?
No problem! Start with DIY fixes: Use books or boxes to elevate your monitor, roll up a towel for lumbar support, or flip a tray over your keyboard for wrist relief. Thrift stores often have affordable chairs or desks—just check for sturdy construction. Pro tip: Invest in one key item first (like a good chair) and upgrade gradually.
How often should I adjust my ergonomic setup?
Check your setup weekly for the first month, then monthly afterward. Life changes (weight gain, new shoes, or even a different laptop) can shift your posture. If you notice discomfort or fatigue, reassess immediately. Pro tip: Set a calendar reminder to “ergonomic check-in”—your future self will thank you!
What’s the best way to troubleshoot ergonomic pain?
If you’re still experiencing pain after setup, identify the source:
- Neck/shoulders: Adjust monitor height or take micro-breaks to stretch.
- Wrists/hands: Ensure your keyboard and mouse are at elbow height.
- Lower back: Add a cushion or use a footrest to support your spine.
Wrapping up and next steps
Creating an ergonomic workstation doesn’t have to be complicated—just smart and intentional! 🌟 By prioritizing proper chair height, screen alignment, and wrist support, you’re already on your way to pain-free productivity.
Small tweaks like taking micro-breaks and organizing your space can make a huge difference in comfort and focus.
Ready to transform your workspace? Start by testing one adjustment today—whether it’s swapping your chair or repositioning your monitor—and notice how much lighter (and happier) your body feels. Your future self will thank you! 🙌