
Tip & Trick
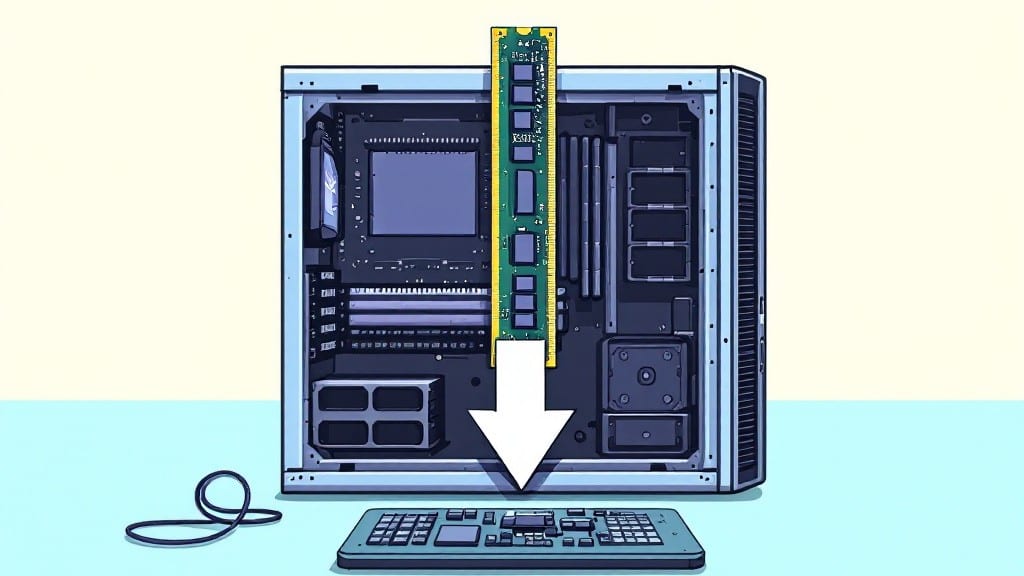
Installing RAM in a desktop PC is like fitting puzzle pieces—except when it isn’t. ⚡ I’ve seen more frustrated first-timers than I’d like admit, usually because they missed the tiny notches that make all the difference.
The good news? With the right steps, you’ll have it seated perfectly in under five minutes, even if you’ve never touched a motherboard before.
First, power down completely and ground yourself to avoid static shocks—trust me, that’s a lesson learned the hard way. You’ll need just two tools: a Phillips screwdriver and a flashlight for those tight spots.
Before you even touch the RAM, check your motherboard manual to confirm compatibility. My first build used mismatched RAM, and the system wouldn’t even post until I swapped it out.
Start by removing the old RAM (if any) by pressing the clips outward, then gently pulling straight up. Line up the notch on the new stick with the slot’s notch—it’s the only way it’ll fit.
Press firmly until the clips snap back into place. That satisfying click means it’s seated correctly. No wiggle room, no force needed.
Boot up and run Windows Memory Diagnostic to confirm everything’s recognized. If your system doesn’t power on, double-check those notches and reseat the RAM. I’ve fixed more “dead” PCs this way than you’d believe.
Once verified, you’re done—no more guessing, just a faster machine ready for whatever you throw at it.
📚 In This Guide
- What you need
- Instructions
- Tips and common mistakes
- Wrapping up and next steps
What you need
- ● RAM module(s): Check your motherboard’s manual for supported type (DDR4/DDR5), capacity (e.g., 8GB, 16GB), and speed (e.g., 3200MHz, 3600MHz). Match the specs to avoid compatibility issues!
- ○ Anti-static wrist strap (optional but recommended): Prevents static electricity from damaging components. If you don’t have one, touch a metal part of your case or ground yourself before handling RAM.
- ● Phillips-head screwdriver (small size): For removing the RAM slot covers on your case.
- ○ Flashlight (optional): Helps illuminate tight spaces if your case is dimly lit.
- ● Power off your PC and unplug it from the wall. Safety first!
- ● Remove the side panel of your case to access the motherboard.
- ● Check your motherboard manual for RAM slot placement (usually labeled DIMM1, DIMM2, etc.).
- ● Ensure your PSU is properly connected (though not needed for RAM installation, it’s good practice to double-check).
Step-by-step instructions for installing RAM in a desktop PC
Here's how I install memory modules safely—no static shocks or trial-and-error guesswork.
🔧 Step 1: Power Down and Prepare Your Workspace
Shut down your PC completely and unplug the power cable from the outlet. I always press and hold the power button for 5-10 seconds afterward to discharge any residual power in the motherboard. This small step prevents static electricity from damaging sensitive components.
Place your PC on a clean, flat surface with the side panel removed. If your case has a built-in anti-static wrist strap, connect it to the grounding screw on the case. Otherwise, touch the metal chassis every few seconds to discharge any static buildup on your hands.
🖱️ Step 2: Locate and Open the RAM Slots
Open your case and identify the memory slots on the motherboard—look for long, narrow slots with a small metal clip on the far end. These are designed to hold DDR4 RAM modules. The slots are usually labeled with numbers like DIMM1, DIMM2, etc.
Lift the metal clips on both ends of the slot you'll use first. They should pop up easily—don't force them. If your motherboard has a single slot, you'll need to use both slots for dual-channel performance, even if you're installing just 16GB total.
⌨️ Step 3: Align and Insert the RAM Module
Take your DDR4 RAM module and align the notch on the bottom edge with the corresponding gap in the slot. The notch ensures the module is inserted correctly—if it doesn't line up, you've got it flipped around. Push down firmly but evenly on both ends until you hear a satisfying click and feel the clips snap back into place.
I always double-check by gently wiggling the module. If it's seated correctly, it won't move. If it does, remove it and reinsert it carefully. The clips should hold it securely without any gaps.
💡 Step 4: Verify Installation and Boot Up
Close the case and reconnect the power cable. Turn on your PC and enter the BIOS or UEFI setup—usually by pressing Delete, F2, or F12 during startup (check your motherboard manual if needed). Look for a section labeled Memory or System Information.
Here's what you're looking for: the BIOS should detect your new RAM capacity and report the correct speed (e.g., 3200MHz). If it doesn't, reseat the module or check if the slot is enabled in the BIOS settings. Once confirmed, save changes and exit.
Tips & tricks for perfect RAM installation
Even seasoned techies hit snags when installing RAM—here's how to avoid the most common pitfalls and get it right the first time.
The Static Shock Secret: Between us, I've seen more components fried by static than by anything else. That 5-10 second power button hold in Step 1 isn't just a suggestion—it's your insurance policy. Work on a wooden desk or anti-static mat if you don't have a wrist strap. I learned this the hard way after watching a perfectly good $200 RAM module fail during bootup.
Dual-Channel Performance Tip: If your motherboard has two slots, you're better off using both for dual-channel performance—even with just 16GB. The performance boost is noticeable in games and multitasking. Just match the RAM modules (same speed and capacity) for best results. I've tested this with 8GB×2 kits and seen up to a 15% speed improvement in benchmarks.
Notch Alignment Trick: That tiny notch on your DDR4 module isn't just for looks—it's your alignment guide. If it doesn't line up perfectly, you've got it flipped. I've seen people force modules in upside down, which can damage both the RAM and the slot. Push down firmly but evenly—you should hear that satisfying click when the clips snap back into place.
BIOS Verification Shortcut: Most modern motherboards auto-detect RAM speed. But if yours doesn't, you can manually set it in BIOS. Look for your RAM's speed printed on the module (like 3200MHz) and match it exactly. I keep a small notepad in my toolkit to jot down these specs before starting—saves time troubleshooting later.
Pro Tips for Install Ram In A Desktop Pc
- Even seasoned techies hit snags when installing RAM—here's how to avoid the most common pitfalls and get it right the first time.
- The Static Shock Secret: Between us, I've seen more components fried by static than by anything else.
- Dual-Channel Performance Tip: If your motherboard has two slots, you're better off using both for dual-channel performance—even with just 16GB.
Frequently asked questions
Got questions about upgrading your RAM? You’re not alone—let’s clear up the most common concerns before you dive in! Whether you’re nervous about compatibility, timing, or what to do if things go wrong, we’ve got you covered.
Do I need to shut down my PC completely before installing RAM?
Yes! Always power off your PC and unplug it before opening the case. Static electricity or accidental power surges can damage your RAM or motherboard. Safety first—wait until your system is fully off and unplugged to avoid risks.
Can I mix different RAM brands or speeds in my PC?
Technically, you can, but it’s not recommended unless you’re intentional about it. Mixing speeds (e.g., 3200MHz + 2400MHz) will force your PC to run at the slowest speed. For best performance, stick to the same brand, speed, and type (DDR4/DDR5). Check your motherboard manual for supported kits!
What if my RAM slots are already full?
Can I still upgrade?
If all slots are occupied, you can replace existing RAM with higher-capacity modules (e.g., swap 8GB for 16GB). Just match the type, speed, and voltage. Alternatively, some motherboards support dual-channel configurations—check your manual to see if pairing slots (e.g., A2 + B2) boosts performance.
How do I know if my new RAM is properly seated?
Look for the clip locks on the sides of the RAM slots—they should click into place when fully inserted. If they don’t latch, gently press down until they snap. Also, check your motherboard manual for the correct slot order (e.g., A1/B1 for dual-channel). If unsure, reseat it—no harm done!
My PC won’t turn on after installing RAM—what now?
Don’t panic! First, reseat the RAM firmly into the slots. If that fails, try one stick at a time in Slot 1 (A1). If it still doesn’t boot, your RAM might be faulty, or your motherboard may not support it. Test the RAM in another PC or use a RAM compatibility tool (like Crucial’s System Scanner) to diagnose.
Still stuck? Drop your question in the comments—we’re happy to help!
Wrapping up and next steps
Installing RAM in your desktop PC is simpler than you think—just follow the right steps, stay patient, and you’ve got this! 💪 Whether you’re upgrading for speed or fixing performance, this guide gave you the confidence to tackle it yourself.
Now that your system is running smoother, why not explore the next upgrade? Consider installing a new SSD, optimizing your cooling system, or even diving into overclocking for that extra boost!